
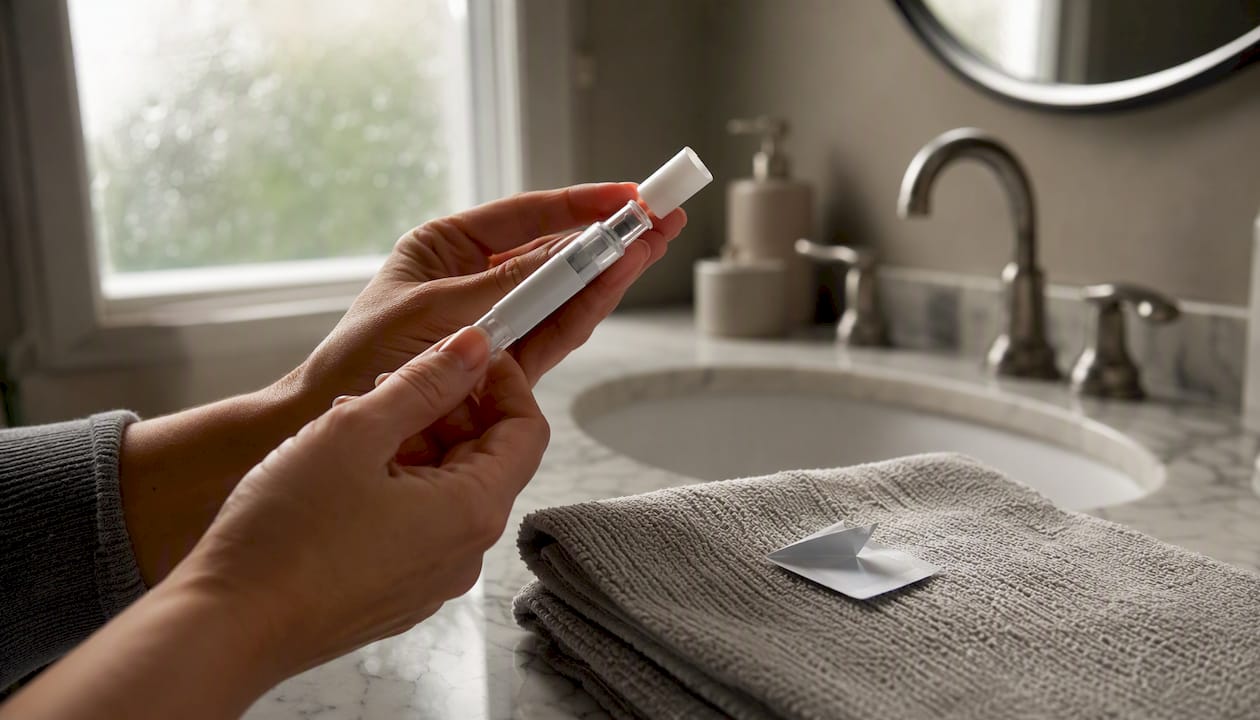
According to manufacturer instructions from Lilly, Zepbound (tirzepatide) has three FDA-authorized injection sites: the abdomen, the outer thigh, and the back of the upper arm. You can self-inject into the abdomen or thigh. The back of the upper arm requires another person to administer the dose.
A few rules apply every single time, regardless of which site you choose:
- Inject subcutaneously only (under the skin, not into muscle or a vein)
- Rotate sites weekly, never using the exact same spot twice in a row
- Keep all abdominal injections a modest distance away from your belly button
- Never share your pen or device with another person, even if the needle is changed
Safety callout: Call your provider immediately if you experience signs of a severe allergic reaction (hives, swelling of the face or throat, difficulty breathing), signs of infection at the injection site (spreading redness, warmth, pus), or unusual or persistent pain after injection.
Key Takeaways
Zepbound injection sites are clinically equivalent in absorption — the right site is the one you can reach, prepare correctly, and rotate consistently every week.
| Point | Details |
|---|---|
| Three approved sites | Abdomen and thigh for self-injection; back of upper arm requires a caregiver. |
| Rotate every week | Move at least one finger-width from last week’s spot; never inject the same location twice in a row. |
| Device differences matter | Single-dose pen is simplest; KwikPen® requires priming; vial requires syringe technique. |
| Red-flag reactions | Spreading redness, pus, fever, or severe allergic symptoms require immediate medical attention. |
| Legacymeds support | Legacymeds provides free provider visits, unlimited coaching, and shipped medication for complete GLP-1 care. |
Sharps disposal reminder: Place all used pens, needles, and syringes in an FDA-approved sharps container immediately after use. Never share your device with another person.
Table of Contents
- Which Zepbound injection sites are right for you?
- Zepbound devices, supplies, and storage basics
- How to prepare before every injection
- Step-by-step: injecting Zepbound with the single-dose auto-injector pen
- Step-by-step: using a vial with syringe and the KwikPen®
- How to rotate sites and manage injection-site reactions
- Troubleshooting, missed doses, and sharps disposal
- How Legacymeds supports safe Zepbound use
- What patients most often get wrong about Zepbound injections
- Legacymeds makes Zepbound care straightforward
- Sources
- FAQ
Which Zepbound injection sites are right for you?
The three approved sites are not interchangeable in every situation. Each has practical advantages depending on your body, your device, and whether you are injecting yourself or receiving help.
Abdomen
The abdomen is the most commonly chosen site for self-injection. Aim for the area roughly 2 inches away from your belly button in any direction, staying within the soft fatty tissue of the lower belly. To make the injection easier, stand upright — standing tends to firm up the abdominal skin slightly, which helps you get a clean, controlled insertion. If you have less subcutaneous tissue in the abdomen, pinching a fold of skin before inserting the needle can reduce the chance of an accidental intramuscular injection.

Outer thigh
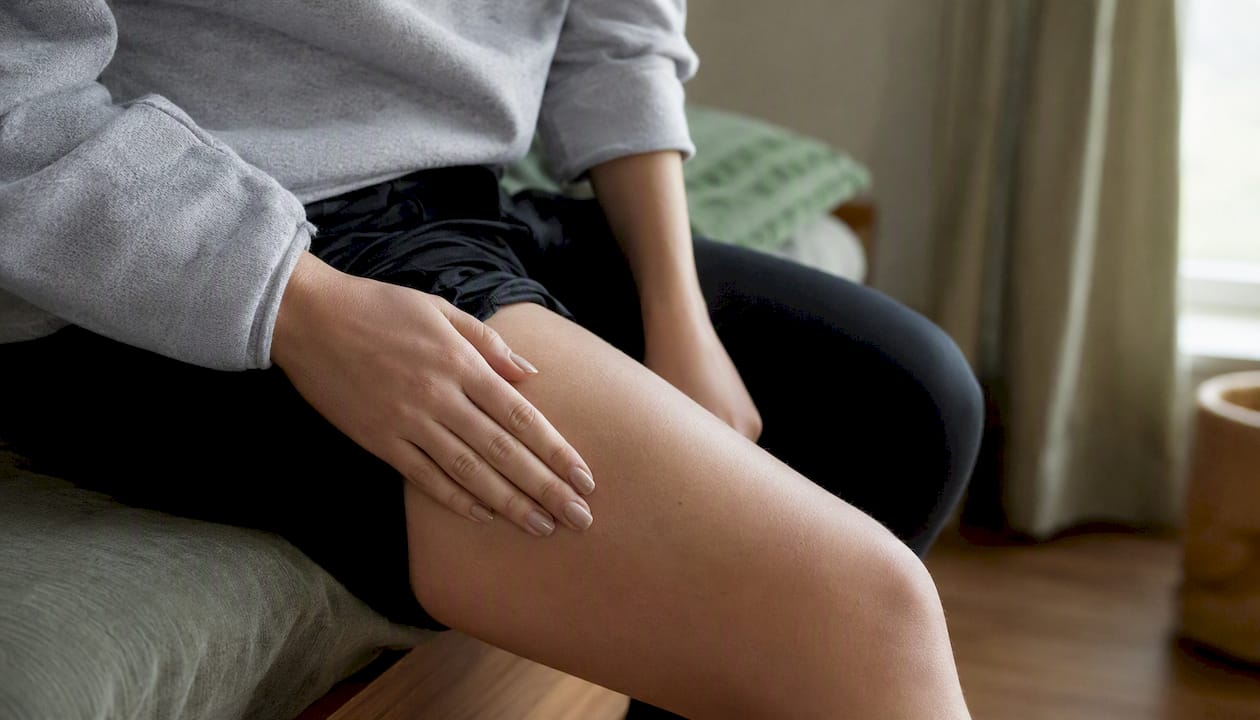
The outer thigh works well for many self-injectors, especially those who find the abdomen uncomfortable or difficult to reach. Sit down with your leg relaxed, and target the middle third of the outer thigh. The muscle beneath is large and the overlying fat layer is usually accessible. Loose-fitting clothing makes this site easier to use without undressing completely.
Back of the upper arm
This site is intended for caregiver administration. Reaching the back of your own arm with a pen or syringe at the correct angle is difficult without a mirror and a second hand to stabilize the device. If a caregiver is giving your injection, this site is perfectly appropriate and clinically equivalent to the others.
Pro Tip: If abdominal tissue feels too soft or difficult to manage, try the outer thigh instead. Patients with limited hand dexterity often find the thigh easier to stabilize during injection.
Zepbound devices, supplies, and storage basics
Zepbound comes in three device formats. Knowing which one you have changes your preparation steps significantly.
| Feature | Single-Dose Pen | KwikPen® | Single-Dose Vial |
|---|---|---|---|
| Doses per device | 1 | 4 | 1 |
| Self-administration ease | Highest | High (requires priming) | Requires syringe technique |
| Preparation complexity | Minimal | Moderate (prime before first use) | Highest (draw, measure, deair) |
| Insurance/billing | Typically covered by commercial insurance | Single-patient-use; check formulary | Often used in direct-pay channels |
The KwikPen® is a single-patient-use device that holds four doses and requires a priming step before first use. The single-dose pen is the simplest weekly option. The vial requires a separate syringe and needle, making it the most technique-dependent format.
Supplies checklist by device
Single-dose pen:
- Alcohol swabs
- Sharps container
- Bandage (optional)
KwikPen®:
- Alcohol swabs
- Sharps container
- Bandage (optional)
Vial + syringe:
- Appropriate syringe and needle (your provider will specify gauge and length)
- Alcohol swabs
- Sharps container
- Bandage (optional)
For subcutaneous injections, an appropriate short needle is generally recommended for most adults, with the insertion angle adjusted based on tissue thickness. Your provider will confirm the right needle for your body.
Storage rules:
- Refrigerate at 36°F–46°F (2°C–8°C); do not freeze
- If needed, a single-dose pen or vial may be kept at room temperature (up to 86°F / 30°C) for up to 21 days
- Before injecting, allow the device to reach room temperature for approximately 30 minutes
- Inspect the solution: it should be clear and colorless to slightly yellow, with no particles or cloudiness
- Discard any device that looks discolored, cloudy, or damaged
Never share your pen or KwikPen® with another person. The KwikPen® is labeled single-patient-use for this exact reason. Sharing devices carries a serious risk of bloodborne infection transmission even when the needle is changed.
How to prepare before every injection
A consistent pre-injection routine prevents most common errors. Run through this checklist before every weekly dose.
- Confirm you have the correct dose strength (check the label on your device)
- Check the device for damage, cracks, or leaks
- Verify the expiration date on the device or vial
- Remove the device from the refrigerator and allow it to reach room temperature for approximately 30 minutes
- Wash your hands thoroughly with soap and water for at least 20 seconds (CDC injection safety guidance)
- Gather all supplies: device, alcohol swabs, sharps container, bandage if needed
- Choose your injection site and inspect it for cuts, bruises, active rash, or irritation — skip any compromised skin
- Clean the injection site with an alcohol swab and let it air-dry completely before inserting the needle
Do not use the device if the solution looks cloudy or discolored, if the device is cracked, or if the expiration date has passed. Do not share devices under any circumstances.
Pro Tip: Pick the same day of the week for your injection and set a phone reminder. Pair the site rotation with a simple note in your calendar — “Week 1: left abdomen, Week 2: right abdomen” — so you never have to guess where you injected last.
Hypoglycemia warning: If you take other glucose-lowering medications alongside Zepbound (such as insulin or a sulfonylurea), your risk of low blood sugar increases. Contact your provider before starting Zepbound to discuss whether your other medication doses need adjustment.
Step-by-step: injecting Zepbound with the single-dose auto-injector pen
The single-dose pen is the most widely used Zepbound device. These steps reflect manufacturer how-to guidance and the FDA-approved prescribing information.
- Remove the pen from the refrigerator and let it reach room temperature (approximately 30 minutes)
- Wash your hands and prepare your injection site with an alcohol swab; let it dry
- Remove the pen cap by pulling it straight off — do not twist
- Inspect the solution through the viewing window: it should be clear and colorless to slightly yellow
- Hold the pen with the base flat against your skin at the chosen site
- Press the injection button firmly until you hear or feel a click
- Hold the pen in place against the skin for the full recommended hold time (follow your device’s specific instructions — typically several seconds) to confirm complete dose delivery
- Check the dose window indicator to confirm the dose was delivered
- Remove the pen straight out from the skin
- Place the used pen immediately into your sharps container — do not recap the needle
Common problems and fixes
- Dose window not filled after injection: Do not re-inject. Contact your provider or pharmacist for guidance on whether a replacement dose is needed.
- Pen clicks but nothing seems to happen: Confirm the base was flat against the skin and the button was fully depressed. If uncertain about delivery, call your provider before attempting another injection.
- Air bubbles visible in the pen: Small bubbles in a pre-filled pen are normal and do not affect dosing accuracy — do not attempt to remove them.
Pro Tip: Counting slowly to 10 after the click before removing the pen is a reliable way to avoid pulling out before the full dose has delivered. Research on subcutaneous injection technique confirms that premature removal is one of the most common causes of incomplete dose delivery.
Place used pens in an FDA-recommended sharps container — a puncture-resistant, leak-proof container with a tight lid. Never place used pens in household trash or recycling.
Step-by-step: using a vial with syringe and the KwikPen®
Vial + syringe
The vial format requires more steps and more technique. If you have prior experience with insulin injections, the process will feel familiar, though there are a few differences to watch for.
- Wash your hands thoroughly
- Inspect the vial: solution should be clear and colorless to slightly yellow, with no particles
- Wipe the vial’s rubber stopper with a fresh alcohol swab and let it dry
- Attach the needle to the syringe and draw air into the syringe equal to your prescribed dose (0.5 mL for most starting doses)
- Insert the needle into the vial stopper and inject the air in — this equalizes pressure and makes drawing easier
- Invert the vial and draw the prescribed volume of solution into the syringe
- Remove any large air bubbles by gently tapping the syringe and pushing them out; small bubbles are acceptable
- Remove the needle from the vial
- Clean your injection site with an alcohol swab and let it dry
- Pinch the skin if needed, insert the needle at 90 degrees (or 45 degrees for thin tissue), and inject the full dose slowly
- Remove the needle and place the entire syringe and vial in your sharps container
Pro Tip: If you have used insulin syringes before, the draw technique transfers directly. The key difference with Zepbound vials: the prescribed volume is typically 0.5 mL, so double-check your syringe markings before drawing. An incorrect draw volume is the most common vial-format error.
KwikPen® (single-patient-use)
The KwikPen® holds four doses and must be primed before the first use and per device instructions.
- Attach a new needle to the pen for each injection
- Prime the pen before first use: follow the device instructions to dial the priming dose, point the pen upward, and press the dose button until a drop of solution appears at the needle tip
- Dial your prescribed dose
- Clean your injection site with an alcohol swab and let it dry
- Insert the needle subcutaneously and press the dose button fully
- Hold for the full recommended seconds before removing
- Remove the needle and place it in your sharps container
- Replace the pen cap and store the pen in the refrigerator between uses
Device error modes to know: Missing the priming step with the KwikPen® can result in an incomplete first dose. Drawing the wrong volume with a vial is the equivalent error for syringe users. If you suspect a partial dose from either device, do not attempt a second injection — call your provider first.
How to rotate sites and manage injection-site reactions
Rotating your Zepbound injection sites is not optional. Injecting repeatedly into the same spot causes localized tissue changes that can reduce absorption and increase local reactions.
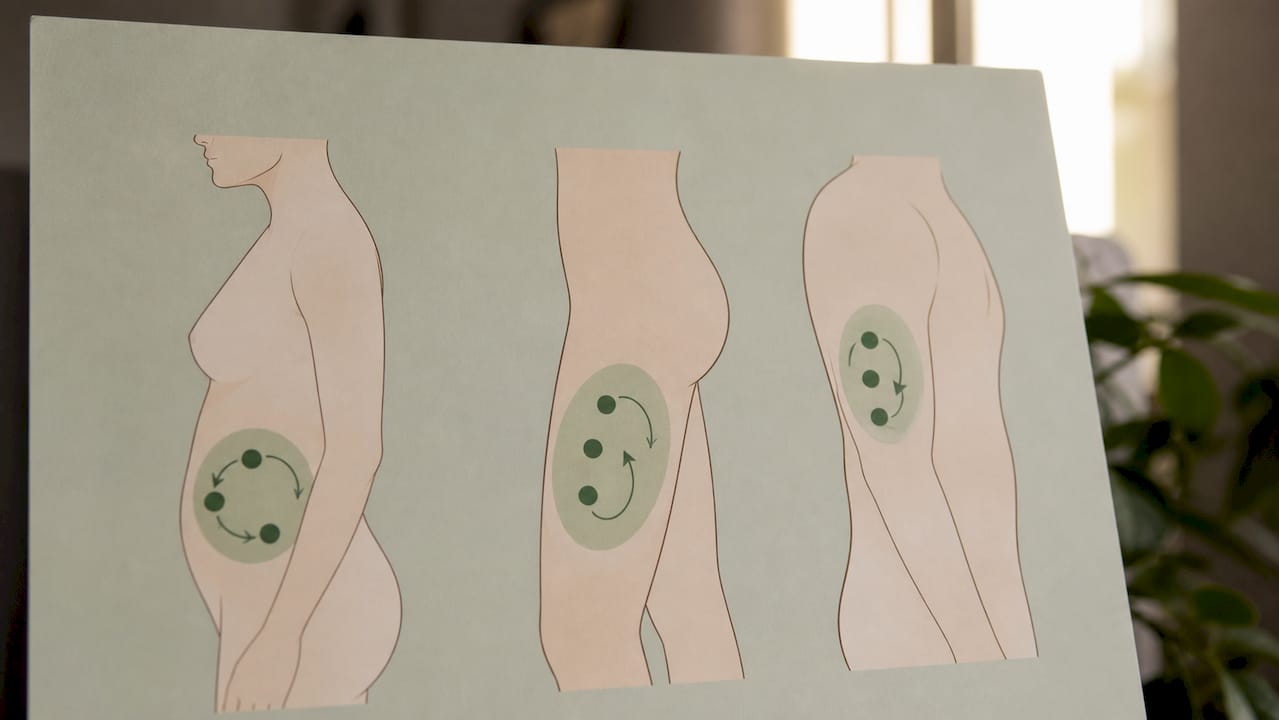
A practical rotation system: divide your abdomen into four quadrants (upper left, upper right, lower left, lower right) and move one quadrant per week. For the thigh, alternate left and right. Within any quadrant or area, move at least one finger-width away from the previous week’s spot. A simple sketch in a notebook or a note in your phone works well as a tracker.
Common local reactions (normal)
- Mild redness or pink discoloration at the site
- Bruising
- Itching or mild swelling
- Brief stinging or tenderness during or after injection
These reactions are typically mild and resolve within a few days. DailyMed’s prescribing data documents injection-site reactions in pooled clinical studies and notes a higher frequency of these reactions in patients who develop anti-tirzepatide antibodies.
Red-flag symptoms — contact your provider or seek urgent care
- Increasing warmth or spreading redness beyond the injection site
- Pus or discharge
- Severe pain that worsens over hours
- Fever accompanying a site reaction
- Hard lump that does not resolve within two weeks
Pro Tip: Applying a cool (not ice-cold) compress to the site for a few minutes after injection can reduce mild stinging and swelling. Avoid massaging the site immediately after injection — it can accelerate absorption unevenly and increase bruising.
Troubleshooting, missed doses, and sharps disposal
Missed dose
If you miss your weekly dose and your next scheduled dose is more than 4 days away, inject as soon as you remember. If your next scheduled dose is within 4 days, skip the missed dose and resume your regular weekly schedule. Never inject two doses in the same week to make up for a missed one.
Device or dose problems
- Suspected partial dose (pen): Do not re-inject the same day. Call your provider to determine whether a replacement dose is appropriate.
- Vial draw error: If you drew the wrong volume and have not yet injected, discard the syringe and start fresh with a new syringe.
- Device malfunction: If the pen or KwikPen® appears damaged or does not function as expected, do not attempt to use it. Contact your pharmacy or provider for a replacement.
Sharps disposal
Place all used needles, syringes, and pens in an FDA-approved sharps container immediately after use. These containers are puncture-resistant and leak-proof. When the container is three-quarters full, seal it and dispose of it through:
- A pharmacy sharps take-back program
- A household hazardous waste collection event in your area
- A mail-back sharps disposal program
- Your local waste management authority’s guidelines for medical waste
Never place loose sharps in household trash, recycling bins, or plastic bags.
Cleaning and hand hygiene
Clean the injection site with an alcohol swab and allow it to air-dry before inserting the needle. CDC injection safety guidance emphasizes that hand hygiene — washing with soap and water for at least 20 seconds — is the single most effective step for preventing injection-related infection. Alcohol-based hand sanitizer is an acceptable substitute when soap and water are unavailable.
When to call your provider or seek emergency care: Seek immediate medical attention for signs of a severe allergic reaction: hives, swelling of the face, lips, tongue, or throat, difficulty breathing, or a rapid heartbeat. Also contact your provider for persistent nausea or vomiting that prevents you from eating or drinking, symptoms of severe low blood sugar (shakiness, confusion, loss of consciousness) if you are on other glucose-lowering medications, or any injection site that shows signs of infection. MedlinePlus tirzepatide information provides a patient-facing summary of common and serious side effects worth bookmarking.
How Legacymeds supports safe Zepbound use
Legacymeds provides GLP-1 care that goes beyond writing a prescription. Their online program includes a telehealth provider assessment, free provider visits, and unlimited coaching support — all without insurance requirements or membership fees. Patients receive their medication shipped directly to them, along with medication safety information and device guidance to support confident self-administration from the first dose.
Specific resources available through Legacymeds:
- Step-by-step injection guides for each device format
- Access to provider visits for device questions, dose adjustments, or adverse event concerns
- Unlimited coaching for adherence support, site rotation reminders, and troubleshooting
- Medication safety education covering injection technique, storage, and side effect management
Pro Tip: If you are unsure about your injection technique after your first few doses, request a video demonstration review through your Legacymeds provider visit. Catching a technique error early prevents weeks of suboptimal dosing.
Getting started is straightforward: complete an online intake, receive a provider assessment, and have your medication shipped to your door. For patients who want to understand Zepbound cost and device options before starting, Legacymeds’s blog covers dosing strengths and titration schedules in detail.
What patients most often get wrong about Zepbound injections
Most injection errors are not dramatic. They are quiet, repeated small mistakes that compound over weeks: holding the pen for three seconds instead of the full recommended time, injecting into the same quadrant every week because it feels familiar, or skipping the alcohol swab when in a hurry.
The hold time issue is worth emphasizing. Patients who pull the pen away too quickly before the dose window confirms delivery are the most common source of “the medication isn’t working” complaints that turn out to be technique problems. Counting out loud to 10 after the click sounds excessive until you realize how short three seconds actually feels when you are impatient.
Site rotation matters more than most patients expect. The abdomen is convenient, so it tends to become the default. But injecting into the same small area week after week creates localized tissue changes that genuinely affect how the medication absorbs. A simple rotation log takes 10 seconds to update and prevents a problem that is entirely avoidable.
For caregivers administering injections into the back of the upper arm: positioning matters. The patient should be seated with the arm relaxed at their side, not tensed. A tensed muscle makes subcutaneous injection harder and more uncomfortable. Communicate before every injection — a brief “ready?” before pressing the button prevents flinching that can cause needle displacement.
Finally, if you are ever uncertain whether a dose was fully delivered, the right answer is always to call your provider before attempting another injection. A partial dose is far less harmful than a double dose.
Legacymeds makes Zepbound care straightforward
Getting a Zepbound prescription is one thing. Getting the ongoing support to use it correctly, week after week, is where most patients need more than a pharmacy can offer.
Legacymeds gives you a complete GLP-1 program: a provider assessment, free provider visits, unlimited coaching, and your medication shipped directly to you — no insurance required, no membership fees. If you are ready to start or want to discuss which device format fits your situation, get started with Legacymeds today. Questions about coverage or pricing? The Legacymeds FAQ covers the most common billing and program questions.
Sources
- Dosing, How to Use & How to Inject Zepbound® (tirzepatide)
- ZEPBOUND (tirzepatide) injection, solution — DailyMed
- Injection safety for healthcare — CDC
- Safely using sharps: Needles and syringes at home, work, and travel — FDA
- Tirzepatide — MedlinePlus Drug Information
This article is general information, not a substitute for advice from a qualified doctor. Consult a qualified healthcare professional about your own circumstances before acting on anything here.
FAQ
Where is the best place to inject Zepbound?
There is no single best site — the abdomen, outer thigh, and back of the upper arm are all clinically equivalent in absorption. Choose the site you can reach comfortably, prepare correctly, and rotate consistently each week.
Do you pinch the skin for a Zepbound injection?
Pinching is recommended when subcutaneous tissue is thin, particularly in the abdomen, to avoid injecting into muscle. If you have adequate fatty tissue at the site, pinching is optional but not harmful.
Is it better to inject Zepbound in the thigh or stomach?
Neither is clinically superior — both are approved self-injection sites with equivalent absorption. The thigh tends to work better for patients who find the abdomen difficult to manage; the abdomen is often easier to see and stabilize. Rotate between sites rather than committing to one permanently.
What is the most effective injection site for Zepbound?
All three approved sites (abdomen, outer thigh, back of upper arm) deliver equivalent results when the injection is given correctly into subcutaneous tissue. Consistent technique and weekly rotation matter more than which specific site you choose.
How long should you hold the Zepbound pen after injecting?
Hold the pen firmly against the skin for the full hold time specified in your device instructions after pressing the injection button, then check the dose window to confirm delivery before removing the pen. Removing the pen too early is one of the most common causes of incomplete dose delivery.